How to Access the Demo Mode
1. Complete the initial system set-up:
2. Once inside the welder’s views press the yellow “Theory” button. The top theory definition will be the Demo Weld application. Press the red Select button to access the demo weld.

3. Press the green Play button to start the demo.

4. Press the red Menu button to access different views inside the helmet.

There is a welder’s view, which is what the welder was looking at during the weld and a free look view which allows movement around the weld in progress.

5. Press the Next or Prev button to toggle between the Instructor’s Cam screen and the welders view screens.
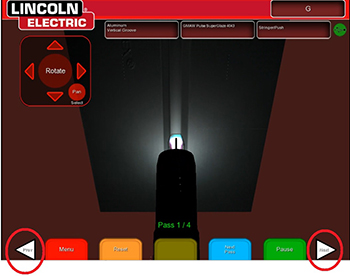
6. Press the orange Reset button to restart the weld demo.

7. For multi pass welds, press the blue Next Pass button

8. To view the previous pass, press the yellow Previous Pass button.

9. To exit the Demo Weld press the red Menu button then the red Select button and highlight Yes using the joystick and press the red Select button. This will move the program back into the welders screen.
