Multi-pass Welding
When comparing the current version of REALWELD® System with the previous generation, one key difference is the trainee’s ability to weld and score multi-pass welds. The current REALWELD system is pre-loaded with a variety of GMAW, SMAW, and FCAW multi-pass DEFAULT welds. The instructor has the ability to create many more.
The original version of the REALWELD system requires the instructor to create a completely separate WPS for each individual pass.
SELECTING THE MULTI-PASS FEATURE
Choosing a multi-pass weld allows the user to practice each specific pass in both the Arc OFF and the Arc ON mode.
- Login using Student Name and Password.
- Press CURRICULUM.
- Choose and select a specific multi-pass WPS.
- If needed, change to the proper welding device and confirm.
- Open up the WPS and review the joint details, settings, and parameters.
- Press WELD.
Note: The pass number on the bottom of the menu will now referencePASS 1.

This current pass must be completed before the next pass can be started. The next pass also cannot be accessed until the user presses the NEXT PASS box (this allows the user to continue to practice the current pass in either Arc ON or Arc OFF mode).
Complete the pass. Allow to score.
7. NEXT PASS will now appear as a menu option.
Press NEXT PASS. The menu will now reference PASS 2.


The WPS parameters are now set for PASS 2.
Note: The system does not allow the user access to any previous pass or skip ahead to the next pass. To return to PASS 1 and start over, simply press CURRICULUM and select the same weld.
MODIFYING A MULTI-PASS WPS
While the current version of the REALWELD system does not allow a DEFAULT WPS to be modified, it can be copied using the saved as icon:

This newly created saved as WPS can now act as a template that can be used to create a new modified WPS.
- Access the Instructor Menu.
- Press the WPS box. Use the drop downs to locate an existing multi-pass WPS similar to the weld you wish to create.
- OPEN the WPS.
- Press the saved as icon.
- Name and enter the new WPS (ex. “2F 6 Pass”).
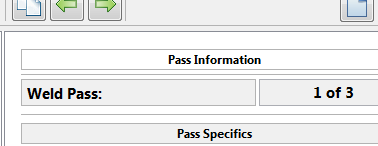
Note: The name on the top of the WPS editor will now show the new name. - On the top right of the WPS editor, there will be numbers listing the number of the current pass (ex. 1 of 3). The parameters listed on the first page are for PASS 1. Press the green arrow to view the parameters for the next pass (PASS 2).
If the weld you are modifying was originally a three pass weld, THERE WILL NOT BE A FOURTH PASS AVAILABLE. To create additional passes press the icon on the top right tool bar that looks like two pieces of paper.
This will copy the current pass.

CREATING ADDITIONAL PASSES
Here is an example, using a three pass 2F horizontal fillet.
- Decide on the parameters for your next pass. If you are modifying a three pass weld (i.e., changing it to a six pass weld) it is likely that the angles for the desired fourth pass would resemble the angles for the existing second pass. So, while onPASS 2, press the paper on paper icon. This will automatically createPASS 4.
Note: All of the parameters are the same asPASS 2. - Modify any parameters that must be changed. In this case, you will most likely choose to move the placement of the next bead. Change theminandmaxvalues forPositionto a distance that would create the desired overlap of the completed beads.

An example would be modifying the min value from-0.35 to -0.45
- A. press on the min value
- B. clear the existing-0.35value
- C. enter new-0.45value
- Adjust max values by following same steps. For this example, change max value from0 to -0.1.
Note: Adjusting the range for themin/maxvalues will also create the control limits for your Position parameter (level of difficulty).
Adjust accordingly. - Adjust the other parameters as preferred. Changes inmin/max Travel Speed, andCTWDshould be considered for each modified pass.
- Continue with steps 3 thru 6 for each additional pass.
THE IMAGES FOR YOUR NEW WELD WILL ALSO NEED TO BE MODIFIED
- Press on the Weld Position Images icon to change the images to match your new WPS.

- PressWeld Sequence Image. Find and choose the desired image, then pressOK.
- Repeat the same process forZoomed Sequence Image.

- Close outWeld Position Imagesby pressing theXat the top right hand corner.
- Save the new multi-pass weld by pressing the save icon on the top left tool bar. Press the small white X at the top right hand corner to close out.

- BE CAREFUL TO NOT PRESS THE REDX. This would eliminate your current pass.
FINAL STEPS
- Attach the new modified WPS to a current or new Curriculum
- Assign the Curriculum to a User
- Logout and login as the User and verify your new WPS
Note any changes that must be made. If necessary, logout and log back in as the Instructor, find that specific weld, press Open and make any needed modifications.